Monday, November 22, 2010
INVENTION
Coconut topped chocolate covered chocolate chip almond coconut cookie dough balls.... You heard it here first... I'll post pictures if the next ones survive for long enough.....
HECTIC AND HAPPY
It has been a hectic few months, and I haven't taken many pictures or written down my thoughts frequently enough. That doesn't mean that nothing is going on, though... in fact, being busier has spurred me to do more than ever. I am loving spending time with my wife and daughter more than anything, and am more tired and more happy than I have ever been in my life.
Here are some of the non-family highlights that come to mind at the moment....
I'm almost done with my first semester of grad school at Cal State Fullerton. I have a midterm and a final for my math class in the next three weeks. The class has been really great and has definitely helped me to not only catch up on math that was shaky for me, but has extended what I already knew quite a bit. We started with differential equations, then went to linear algebra and complex analysis. These three topics were covered in my undergrad, but they were treated as separate subjects. The class I'm finishing up has combined these three topics, which was new to me... So instead of just solving a differential equation, now it is a matrix differential equation involving imaginary numbers. I think I'm still not there with combining all three together, but my understanding of each individual topic has definitely vastly improved through the combination.
On top of the math class, I started a robotics project worth two courses of credit. I am using a lego mindstorms kit with a gyro sensor, and am designing, building, and programming a two-wheeled balancing, maze solving robot. I am writing my own code in a program called "RobotC", which is basically C-Programming with a few add-ons. The technical term for the robot is an "inverted pendulum"... it's basically a miniature segway. I'm very proud to say that I've finally gotten the robot to stay standing until the batteries run out, which was not an easy task. I ended up using a double P-I control scheme, taking data from both the gyro sensor and motor encoders to balance the robot. It was surprising to me how much the data from the wheels mattered. I could not get the robot to balance using data from the gyro sensor alone, which was very counter-intuitive to me. Here's a quick video of the robot balancing...
The other thing that I am really excited about right now is the homemade smoker that my Dad and I are building. It is made from 3/16" steel... the grill is 20" around and 24" long, and the firebox is 12X17X14". I'm really looking forward to the food that is going to be coming off of this monster, but I'm equally enjoying building it. I will definitely be posting some pictures as soon as I can... My dad is really, really good at metal-working, and I seriously think this could very well be the highest quality smoker ever built.
That's it for now.....
Wednesday, October 27, 2010
SHOWDOWN
After letting my citrus rinds steep in everclear for four weeks, I finally got to make my first batches of crema di tangellocello and crema di limoncello.
I started out with the tangello liquor, and made a mixture of 25% alcohol, 25% sugar, and 50% cream. I was disappointed in this mixture because it froze hard and it was very, very strong... too strong...
After taking a few days to think about it, I made a syrup of 50% water and 50% sugar, which I added to the tangellicello until it tasted better. It is now delicious! The only problem is that the tangello flavor is a bit milder than I would like it to be, (because of all the doctoring) and the mixture freezes enough that it can't be poured right out of the freezer...
With a little experience under my belt, I adjusted my recipe for the lemon liquor. For my second attempt, I made a mixture of 50% sugar, 25% whole milk, and 25% heavy cream. The total came out to right around seven cups. I slowly added this mixture to the liquor until it tasted right... For 1.25 cups of lemon alcohol, I used about 5 cups of milk mixture....
This one came out just right! The citrus flavor is strong, the sugar counteracts the harshness of the liquor, and there is just enough of that lovely, warm, boozy glow...
Here is a more detailed run-down of the process... I'll give proportions for a full bottle of everclear:
Step 1: Strain the rind out of the liquor.... You may have to pour some of the liquor back into the bottle to get all the rind out...

 Step 3: Strain any solids out of the milk mixture.
 Step 4: Add the milk mixture to the liquor slowly. Taste as you go to make sure you don't over-dilute your liquer...
Step 5: Freeze and enjoy!
I thought that there would be a clear winner between the lemon and tangello flavors, but I have to say, that I really like them both in their own way. Properly made, I think the tangello flavor would be every bit as good as the lemon...
I started out with the tangello liquor, and made a mixture of 25% alcohol, 25% sugar, and 50% cream. I was disappointed in this mixture because it froze hard and it was very, very strong... too strong...
After taking a few days to think about it, I made a syrup of 50% water and 50% sugar, which I added to the tangellicello until it tasted better. It is now delicious! The only problem is that the tangello flavor is a bit milder than I would like it to be, (because of all the doctoring) and the mixture freezes enough that it can't be poured right out of the freezer...
With a little experience under my belt, I adjusted my recipe for the lemon liquor. For my second attempt, I made a mixture of 50% sugar, 25% whole milk, and 25% heavy cream. The total came out to right around seven cups. I slowly added this mixture to the liquor until it tasted right... For 1.25 cups of lemon alcohol, I used about 5 cups of milk mixture....
This one came out just right! The citrus flavor is strong, the sugar counteracts the harshness of the liquor, and there is just enough of that lovely, warm, boozy glow...
Here is a more detailed run-down of the process... I'll give proportions for a full bottle of everclear:
Step 1: Strain the rind out of the liquor.... You may have to pour some of the liquor back into the bottle to get all the rind out...

Step 2: Place the strained rind, along with two vanilla beans, 8 cups of Sugar, 4 Cups Heavy Cream, and 4 Cups Whole Milk into a large pot. Heat gently until the sugar dissolves completely... If you rub the liquid between your fingers, you shouldn't feel any granules....


Step 5: Freeze and enjoy!
I thought that there would be a clear winner between the lemon and tangello flavors, but I have to say, that I really like them both in their own way. Properly made, I think the tangello flavor would be every bit as good as the lemon...
Thursday, October 14, 2010
CELLIST
About three weeks ago, I started an excellent experiment. After trying my Aunt's Limoncello, I thought it would be interesting to try making a new drink in the same style, but with a little twist. I decided that tangerinicello would have to be good, but, unfortunately, tangerines are not available right now. Instead, I picked up some tangellos, and will be attempting a surely brand new flavor, tangellocello. Just for the sake of good science, I decided to make some old school limoncello as well, so that we'll have a control to compare the new flavor to... wink, wink.....
This whole limoncello thing always seemed really complicated to me for some reason, but I was happily surprised to find out that it is actually quite simple. Buy a bottle of everclear from the liquor store and soak the rind of 10 citrus fruits or so in it for 2-8 weeks.... I used 1/2 a bottle and six fruits for each flavor.

I grated the zest from the lemons and tangellos, and got about 45 grams by weight for each.
 This went into bottles with 1/2 of a 750 ml bottle of everclear. After something like 40 days, I'll strain the rind out of the alcohol and mix in some cream and simple syrup... at that point, the citrus showdown will begin....

This whole limoncello thing always seemed really complicated to me for some reason, but I was happily surprised to find out that it is actually quite simple. Buy a bottle of everclear from the liquor store and soak the rind of 10 citrus fruits or so in it for 2-8 weeks.... I used 1/2 a bottle and six fruits for each flavor.

I grated the zest from the lemons and tangellos, and got about 45 grams by weight for each.


Tuesday, September 21, 2010
HOW TO EAT
It's been a while since I've posted here because I've been so wonderfully busy with work, school, and my beautiful wife and daughter, but this past weekend, we took a break from life by visiting my aunt and uncle on Catalina Island.
We had a great time, but that's not what this post is about. This post is about eating... not so much the food that we ate, but the style of eating that my family partakes in. I think that modern Americans have lost something very significant in the hurried style of guilty eating that seems to be the norm. Spending time with my family, eating meals like my grandparents ate remided me that there is a whole lot more to a meal than flavor (not that there was any shortage of that).
A truly excellent meal is not only about eating good food, but it is about creating the right atmosphere and mood to enjoy that food properly. First and foremost, I believe that each person who is going to eat the meal should take some part in creating it, and should taste and sample liberally along the way. To me, the most important aspect of this is that it helps to build anticipation, and gets the proper mood started. The more work that goes in, and the longer the meal takes to prepare, the greater the excitement and anticipation will be.
Once the meal is well on its way in the kitchen, an apertif should be enjoyed. This gets the digestive system started, loosens tension, and sets the mood for a relaxed, liesurely meal. My favorite so far is Crema di Limoncello...
A little while after the cooking, sampling, and apertif have taken place, the meal can finally begin. There are four elements to the meal that I think are important. 1) The flavor needs to live up to the anticipation that has been building. Simplicity and freshness usually accomplish this 2) There should be at least three dishes 3)There needs to be an endless supply of french bread for dipping. 4) There needs to be at least one dish that can be eaten with the hands. A fork and knife do not allow the proper level of intimacy with your food, and you have to eat something with your hands to really get in the spirit of a good meal. The main portion of the meal should be liesurely and relaxed and there should be far too much food for anyone to finish.
Following the main meal, its always a good idea to serve fruit and/or nuts. Fruit and nuts are light and refreshing, and will eliminate the heaviness that comes with an extravagant meal. Again, liesure is key. Everyone should lounge around the table, picking at the fruit as they desire.
Following the fruit, coffee and dessert are essential. The dessert should be simple and not overly rich or heavy. The coffee should be strong. This would also be a good time for a digestif or after dinner liquer to further aid with digestion.
A meal like this, if done in the right spirit, should take at least an hour to eat. Be prepared - an after-meal nap is pretty much inevitable.
Now, I know that this whole thing sounds crazy and excessive, but in reality, it is not. Just because the meal is extensive does not mean it is unhealthy. Fresh, natural ingredients are key. Also, a meal like this is best served in the late afternoon so that only a very light dinner (if anything) is needed afterward.
I think everyone should give a meal like this a chance. It is probably something best done on a Saturday or Sunday afternoon, but I guarantee that eating a meal the way my grandparents ate will leave you feeling whole and happy through and through.
Sunday, August 29, 2010
DAY ONE
The starting shot has been fired, and school has taken off at a gallop. I'm really grateful that I took the time to do some review before the class began. I was at least able to understand what the teacher was talking about during the first day of class. The first session was a "review" of what I'm supposed to remember from my undergrad years, but it went well beyond everything I reviewed or remembered. It basically summed up an entire semester of differential equations in 3.5 pages of notes.
After about 10 hours of studying on Friday and Saturday, I feel like I can do most of what I need to do, but I still get stuck because of basics that I have forgotten or never learned. My biggest achilles heel is integration. I can do the easier integrals, but anything beyond the basic techniques throws me off.
Almost all engineering courses, at their core, are pretty much just applied math. I am hoping to use this math class to reset myself. If I can really learn this stuff, the other 9 classes I'll be taking will be much easier.
Tomorrow's class is going to be more "review", going into second order differential equations. On Wednesday, the "real" material will begin.
I'm thinking that maybe my cooking interests should shift to the finer points of coffee for a while...
Sunday, August 15, 2010
TOMATOES VS TOMAHTOES
I've always felt that some tomatoes were better than others, but, a new realization has dawned on me that there is a drastic tomato conspiracy going on. It all started with this... our first home grown tomato.

We ate it with some good salt and olive oil, and it was pure heaven... like the essence of summer had been packed into every delicious bite, and I thought, "man, this is one tasty tomato!" I went on with my life, though, not really giving it another thought... until my aunt came to visit.
It just so happened that we had a ripe tomato on the vine, and some heirloom tomatoes we had bought from the grocery store. When my aunt pulled out a bag of cherry tomatoes she had just picked up from a farmer's market, it was clear that a taste test would be required. We cut the tomatoes up and got out the olive oil with some finishing salts...

The home grown tomato is on the left, the heirloom from the store is on the right, and the cherries are in the back. The differences were shocking, and the decisions were easy...
The cherry tomatoes were the best plain eating tomatoes. They had just the right amount of sweetness, but still had that distinct tomato"ness." Salt and oil were just a distraction on these, and actually made them taste worse. They're winners for needing nothing but themselves to be perfect.
The home grown was my favorite, but only with olive oil and salt on it... Don't get me wrong, it was great by itself, but not much of a match for the cherries. With the oil and salt, though, it was a whole different story. I really can't think of much else that would taste better, short of having two.
The store bought tomato was just sad. It was watery, and had no tomato soul. It was hardly a tomato at all... it was clearly a tomahto, and it made me scared for the fate of tomatoes as a whole. The farmers and grocery stores that sell these phonies should be ashamed, and should be required to label their fruits as tomahtoes to avoid any confusion.
This whole taste testing experience really got me thinking, and has opened my eyes to the underground world of real tomatoes. I am very interested in this all these tomatoes that I have been missing, and am looking forward to exploring all the new varieties that I can get my hands on...
Friday, August 13, 2010
RE-LEARNING
I graduated from college with my Bachelor's degree over 5 years ago, and really haven't used most of the math and science that I learned. Since I'm jumping back into school with a math class, I decided I should brush up on all my old classes so that I at least have something to start with when I walk through that classroom door. That's why I bought these:

At this point, I've gotten through the beginning Calculus book. I took the corresponding course over 8 years ago, but I was suprised at how quickly it all came back.... It was actually kinda fun! I'm really enjoying learning things because I want to, and not because I need to learn them for a class.
The biggest thing I took away from my beginning Calculus review was that Calculus has everything to do with rates of change. It's actually really cool... The classic example for calculus is a ladder. If the bottom is moving away from a wall at a certain rate, calculus and some trigonometry will let you figure out how far the top of the ladder is moving down the wall.... You can also use calculus to find volumes of things, which is also really cool... it is where many of the equations for volumes of odd shapes actually come from, and it is really interesting to see how people came up with a lot of the equations I use all the time....
Next up is the advanced calculus book... I'm hoping to at least get through that before I start school a week from Monday... wish me luck!
Sunday, August 1, 2010
ENTER NERDY
Ever since my wife and I had our baby, I've turned to cooking for entertainment. I am usually not happy if I'm not creating something that is a challenge to me, and I've found just what I have needed to satisfy my restlessness in barbecue and charcuterie. These things are great because they let me hang out with my family and give me some elaborate little challenges to conquer at the same time. Unfortunately, cooking fatty meats is not the healthiest of hobbies, and so, I often feel guilty about pursuing my passions.
I think things will be balancing out a bit more in the next few weeks. I'm going back to school for my Master's in mechanical engineering, with a focus on robotics, and am going to be very, very busy trying to learn new things. I think this is going to be good for me... It will give me some serious challenges that will keep me occupied without the use of food, while still allowing me to spend a lot of time with my family (quietly).
I've talked before about how this blog is interesting to me, because it gives me a timeline of my hobbies and interests... In three weeks, that timeline is likely going to have a big kink in it. I'm sure I'll still tackle some exciting meat projects from time to time, but, I am also interested in attempting to use my blog to help me retain the things that I am learning in school. I'm trying extremely hard to approach school with a new attitude... one where I study and learn because I am interested in the subject, rather than just trying to pass the classes.
I plan to use my blog to help me record my revelations and thoughts, or maybe even explain some things to myself that I have a hard time understanding. In short, it is probably going to get real mathy and nerdy around here, real fast...
Saturday, July 31, 2010
MORNING BLISS
Sometimes the little things in life are what matter most. For me, breakfast sausage is one of those little things. I ordained my sausage stuffer by filling it with ground pork, sage, garlic, and ginger, and creating 3 feet of pure joy. It was a huge success, and I am now hopelessly hooked on homemade breakfast meats. I used the recipe for breakfast sausage in the book, "Charcuterie." It was just right, except that I overdid the salt a little tiny bit. The recipe was for 5 pounds of meat, and I used 2 pounds 4 ounces. I just halved the recipe instead of figuring out the exact proportions, which is probably why the salt was a bit heavy.
Here's my 2.25 pounds of diced pork butt, fresh from the freezer. Sage, Garlic, Ginger, Salt, Pepper, and Chile di Arbol were minced together and added to the pork...


Notes for next time? Less salt, more Chile di Arbol.... I used 1/2 tsp in this recipe, and would bump it up to 3/4 next time... the chile gives a nice slow, back of the throat heat that is just perfect in the morning....
I challenge anyone to come up with a better way to start a weekend... It's just not possible as far as I'm concerned.
Here's my 2.25 pounds of diced pork butt, fresh from the freezer. Sage, Garlic, Ginger, Salt, Pepper, and Chile di Arbol were minced together and added to the pork...

Here's the whole setup: kitchenaid mixer with paddle attachment, meat grinder, sausage stuffer, frozen bowl, and ice cold meat...


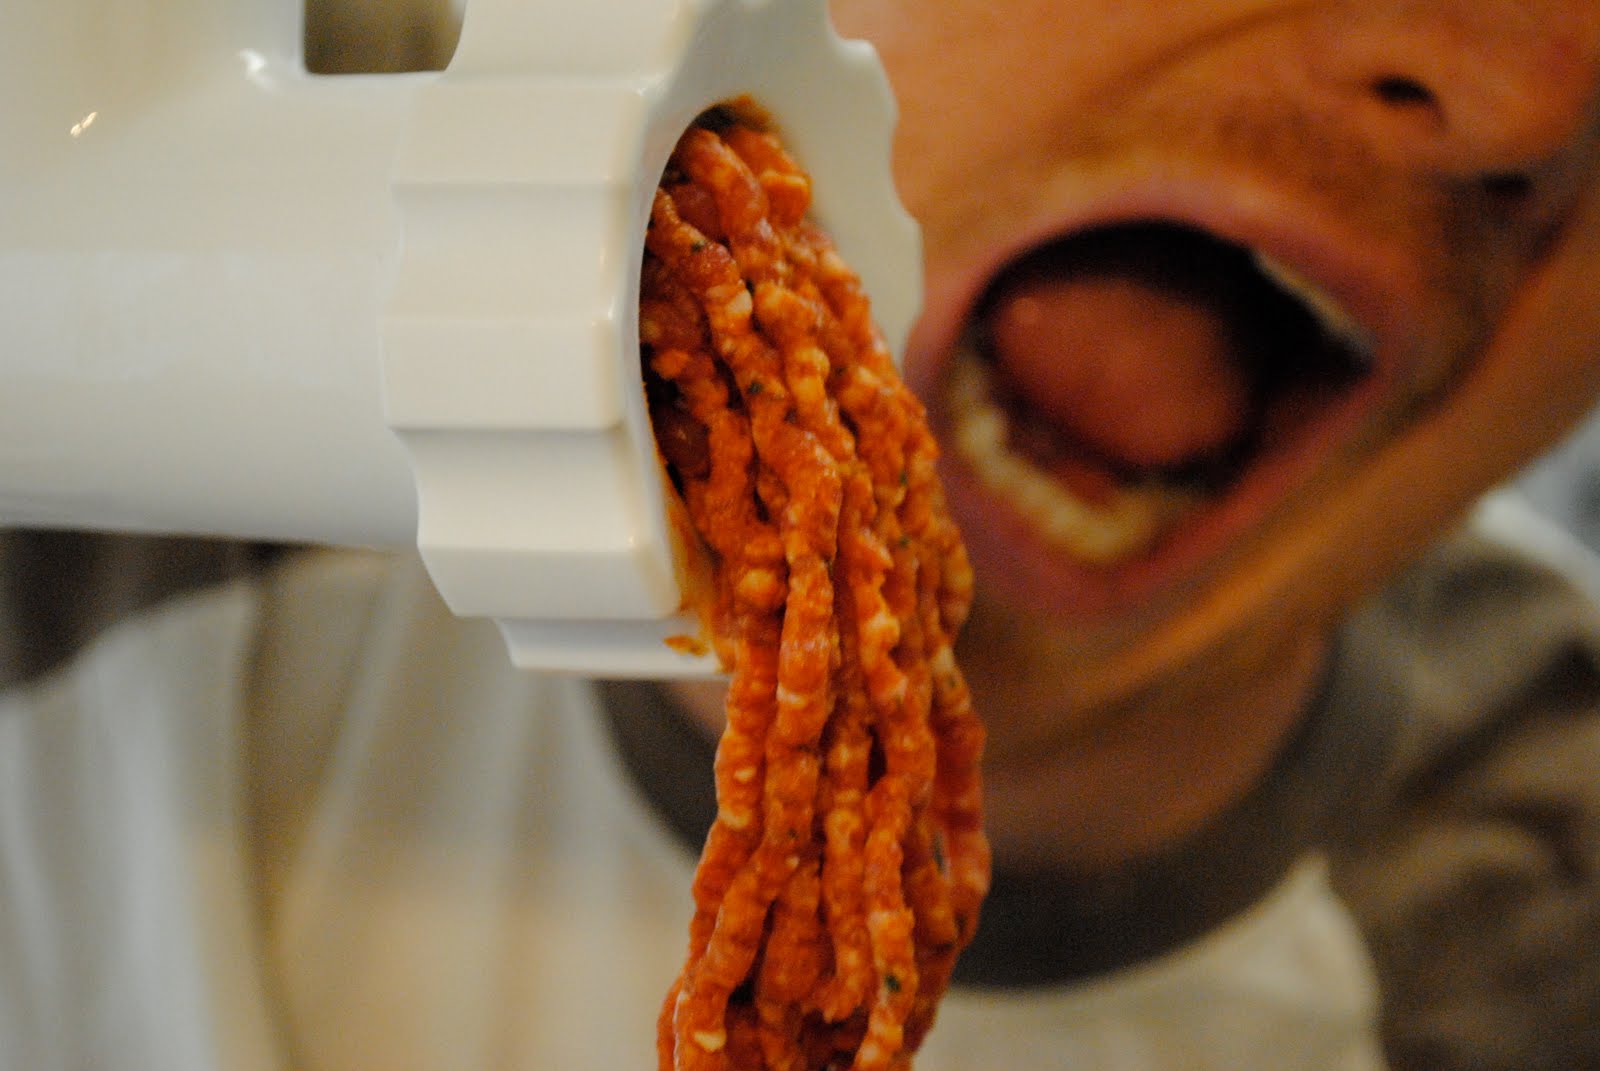
Once the meat was ground and mixed, it took less than five minutes to stuff it into the casings with my new sausage stuffer... It was like a meat fountain.... amazing!!! The new tool really makes the whole sausage making ordeal quick and easy, removing the most tedious part of the process.....

I cooked the sausages very gently with a little bit of water in the pan...

Once they were cooked through, I cranked up the heat and gave my little babies a nice tan...

And here they are... moist, tender, flavorful.... a breakfast sausage like none I've ever had before...

Notes for next time? Less salt, more Chile di Arbol.... I used 1/2 tsp in this recipe, and would bump it up to 3/4 next time... the chile gives a nice slow, back of the throat heat that is just perfect in the morning....
I challenge anyone to come up with a better way to start a weekend... It's just not possible as far as I'm concerned.
Saturday, July 17, 2010
WORM PROBLEM
So, If you read my post about sausage, you might have noticed that I was less than pleased with the kitchenaid sausage stuffer attachment.
The reason that I don't like using the meat grinder for stuffing is that it uses a worm gear (A) to move the meat through the device.
 If you're grinding larger, slightly frozen chunks of meat, this is perfect, but when it comes to the soft, delicate sausage meat that we want to stuff in a casing, it runs into trouble. Because the meat is so smooshy, it compresses, and when you try to push it into the worm gear, it doesn't get grabbed and moved along like a chunk of meat would. It gets smashed and sticks and fights back in pretty much every way it possibly can. In addition, the meat I was so careful to grind just right gets smeared inside the gear, all along both interior surfaces. This is not good. It is a pain in the butt, and kinda takes the fun out of sausage making, turning it into a holiday activity that is only done every other year or so.
That's why I decided to buy this beauty... a vertical sausage stuffer.
 I want to look at sausage making as something fun and exciting, and not as a chore. I'd rather focus on flavor and quality than fiddle with the whole worm gear meat smashy business. With this stuffer, you pack all the meat into the cylinder (up to five pounds for the model I ordered), you put a plate on top, and you turn the handle. Just like that, the meat comes out the tube at the bottom. I like this because it is simple. It's like a super soaker made for meat! The steady pressure won't smear and smash the fragile meat mixtures, and you get a constant, even stream of sausage.
I know this thing is a little bit overkill, and will probably never pay for itself, but it makes up for all that in awesome. It is also one of several key pieces to accomplishing my goal of making a salami from scratch. The next piece of the puzzle is a curing chamber with temperature and humidity control... more about that another day... in the meantime, I need to hone my skills on some fresh and smoked sausages...
The reason that I don't like using the meat grinder for stuffing is that it uses a worm gear (A) to move the meat through the device.

That's why I decided to buy this beauty... a vertical sausage stuffer.

I know this thing is a little bit overkill, and will probably never pay for itself, but it makes up for all that in awesome. It is also one of several key pieces to accomplishing my goal of making a salami from scratch. The next piece of the puzzle is a curing chamber with temperature and humidity control... more about that another day... in the meantime, I need to hone my skills on some fresh and smoked sausages...
Sunday, July 11, 2010
PUTTING THE "HAM" IN HAMBURGER
Why's it called a hamburger if there's no ham in it? Today, we had some family coming over, so we decided to make a hamburger that actually had something to do with ham. I chose to grind the meat myself to make sure it was exactly what I wanted. The pink ground meat at the store has all the fat smeared into it, and just can't compete with properly ground, fresh meat. When the store ground meat is cooked, all the fat drips right out of it, but home ground meat retains its moisture because the fat is in tiny chunks that can hold on.
I diced all the meat, mixed in the seasonings, and put it in the freezer for two hours to firm up for grinding. The time in the freezer is essential because it allows the grinder to cut the meat, rather than smash and tear it. After grinding, I mixed the meat a bit with the paddle attachment of my mixer, divided it into 1/2 pound balls, and got to patty making.
I broke each ball in half, folded a slice of american cheese (no other cheese can achieve quite the same liquidy texture as good old american), and sandwiched it inside the middle of each patty.

Here they are completed, with their secret cargoes of cheese...

Then, it was off to the barbecue to cook over medium indirect heat for around 30 minutes. These burgers were so thick that, had I cooked them over the coals, they would have burned on the outside, but been raw in the center. I moved the patties around carefully to make sure that they all got the right amount of heat and browning.
Here are the hammies right after being flipped. As the cheese in the center of each patty begins to melt, it liquifies, seeps through every nook and cranny of the meat, and comes oozing out like lava from heaven.

I topped the patties with more cheese and cooked them to a final temperature of about 160F.

We served the patties with bacon, avocado, and all the usual fixuns...

I think these were the best burger patties I have ever made. I'm definitely a fan of the porky hamburger, and will not be going back to the all beef patty if I have any choice in the matter. The meat just had a great flavor to it that you can't get with beef alone.
The only thing I would change is the cheese. I thought that american would be perfect since it would liquefy so well, which it did, but something about american cheese with such a premium patty was not quite right. These things deserve a higher class of cheese... possibly something a little milder that will give some nice creaminess, but not mask the taste of the meat too much. .. maybe a gouda or a brie? Anyhew, the american was delicious in its own way, and I have no regrets.
These patties were a hit, and I plan on fine tuning them a bit, but I think I've finally got the burger I've been looking for... all I needed to do was put back the ham.
Sunday, July 4, 2010
UBERLINK
Sausage happened today, and it was no accident. I've never made sausage before, so I recruited an extra set of hands for the project. If you plan on making some sausage of your own, I highly recommend getting a little help. With beginner's equipment, sausage making alone would be next to impossible.
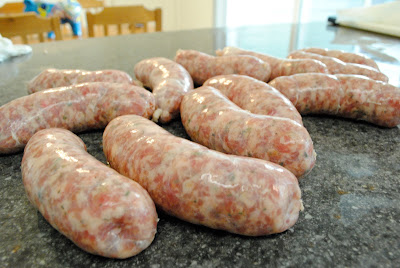
I chose to make Roasted Poblano Sausage for my first attempt.... Here is how it went...
The day before, I diced four pounds of pork butt, and added the spices. We used oregano, cumin, fresh garlic, salt, paprika, new mexico, and chipotle chile powders....


CLICK ME, CLICK ME!!!!Notes for next time? Buy a real sausage stuffer, make sure the sausages are extra spicy, and prick each link so that they don't explode on the grill. Other than that, these things were a huge success. The texture was excellent, the casings had a nice snap to them, and the flavor was just right.... even my wife, who has a long-standing feud with stuffed sausages, had to admit that these babies were "taaaastaay."
I definitely have a new favorite pasttime to add to my collection.

Mix it all up real well...

This next part is critical... before grinding, the meat should be partially frozen. I put the chunks into the freezer for about an hour and a half, and it was just right. This will ensure that you are cutting your meat, rather than tearing it. It is important to cut the meat and to keep everything ice cold if you want a good texture... Grind the meat into a bowl set in ice..... and resist the temptation to eat it then and there.
Once the meat was ground, we added diced roasted poblano peppers, cilantro, and ice water. The whole mixture got mixed by the kitchenaid paddle attachment until it was sticky enough to bind together. This is where some fun came in... we fried a few bits of sausage to check for seasoning, and it was delicious!
All this time, the hog casings were soaking in lukewarm water. We rinsed them very well, then slid one onto the kitchenaid stuffer attachment, tied a knot in the end and got stuffing. I have to note here that the kitchenaid sausage stuffer is a piece of garbage. The grinder is great, but for anything more than extremely occasional use, the stuffer is a real chore. This is where the help of my awesome assistant/photographer came in. With Mercurystate's help feeding the meat into the stuffer, and over an hour of back and forth tugging, we managed to create this beautiful work of porky art...

Which we then twisted into links....

smoked over indirect heat....

and crisped over hot coals...

CLICK ME, CLICK ME!!!!
I definitely have a new favorite pasttime to add to my collection.
Friday, July 2, 2010
SUMMER PIE
Well, it turns out that, thanks to the pioneer woman, the easiest dessert you could possibly make is a blueberry pie. I have never made a blueberry pie before, and was totally and completely shocked by how simple and delicious it can be. You can make it more complicated if you want to make your own crust, but in this case, I needed a quick dessert, and didn't want to put in the effort to make a crust from scratch, so I just bought one at the grocery store.
To make the pie, you put the bottom crust in a pie pan and toss 2-3 pints of blueberries with as much sugar as you like and 2-3 Tablespoons of flour. Pour the blueberries into the bottom crust, add a few pats of butter and the top crust. Make some vent holes in the top crust, and bake for 45 minutes or so at 400F.... and voila... like magic, you have one of these....

To make the pie, you put the bottom crust in a pie pan and toss 2-3 pints of blueberries with as much sugar as you like and 2-3 Tablespoons of flour. Pour the blueberries into the bottom crust, add a few pats of butter and the top crust. Make some vent holes in the top crust, and bake for 45 minutes or so at 400F.... and voila... like magic, you have one of these....

Next time, I think I'm going to add a little lemon juice and zest to brighten the flavors up a bit more... but all in all, the work to deliciousness ratio of this pie is sky high!
Thursday, July 1, 2010
HELLO NORDELLO
Thanks to my Aunt, a global bucket, and a whole lot of stinky fish heads, I finally was able to cook an entire side dish from something I grew myself! When I checked my Nordello pepper plants the other day, I found seven giant peppers, and decided it was time to go for it.


 The peppers were sweet with a buttery, silky texture, and were well worth the wait. With all the anticipation and waiting, I feared they would be a let down, but these peppers were far from it.
I'm still waiting for the day I can make an entire meal from vegetables I grew, but this will do quite nicely until then...

I picked the peppers....

Sauteed them with a little oil, salt, and garlic...

And took that first glorious bite of self sufficient deliciousness

I'm still waiting for the day I can make an entire meal from vegetables I grew, but this will do quite nicely until then...
Sunday, June 27, 2010
GET FLANKY
I've never tried it before, but I grilled some flank steak today... it was quite fantastic. If you want an easy, low maintenance cut of meat, this is it. Not quite as tender as tri-tip, but really flavorful and very fast to prepare. If you feel like barbecue, but don't want to put in a whole day of work... give flank steak a try and you won't be disappointed.
I rubbed the steaks with horseradish, garlic, and olive oil, then barbecued them over very high heat. After about 4 minutes a side, they were medium rare.

After a 10 minute rest, I sliced the steaks across the grain, and sprinkled them with a bit of sea salt.

French rolls were then piled high with horseradish and the meat. I also grilled some mushrooms and potatoes that we tossed with baby greens and coated in a lemon-dill vinaigrette. It was an excellent salad, but the leftover vinaigrette was even better on the meat along with the horseradish. The lemon and dill were fresh, clean flavors that just added that extra little something that made this especially tasty.

Saturday, June 26, 2010
RUBADUB
My wife and I have come across a rub recipe that is pretty much always good, on just about any cut of meat, especially pork. It is an anise-garlic rub, and goes a little something like this:
Combine the following in a small bowl:

3 Tbls Olive Oil
2 Tbls Ground Anise Seed (I use a mortar and pestle to grind them)
1 Tblsp Minced Garlic
1 Tblsp Anisette Liqueur
2 tsp Kosher Salt
2 tsp Ground Black Pepper
In this case, we cooked a pork loin, but you can really adapt this to pretty much anything. I brined this pork loin in 1/4 cup salt, 2 Tbls Sugar, and enough water to cover the top of the pork in a gallon ziploc bag. If you do the brine, its best to get the pork in there for about 8 hours, but even half that time makes a difference.
Rinse and dry the meat, then heavily coat it with the rub (I think I doubled the recipe for this pork loin...), then let it rest for 30 minutes or so at room temperature, while your coals are lighting.

Place the pork over direct medium heat, and turn it every 5-10 minutes, until it is brown all over. You want to cook the pork to about 150F in the center. If the meat is getting too dark, move it away from the coals to finish cooking over indirect heat. Depending on the size of the meat, it should take 45-90 minutes or so...

Let the meat rest for at least 5-10 minutes, then slice it into 1/2" medallions. If you like, you can add some olive oil to any leftover rub, and drizzle it over the meat.

I love this recipe because, with a little planning, it is totally doable on a weekday. Something that tastes this good on a weekday is almost a crime...
Friday, June 25, 2010
THOUGHTS AND IDEAS
I heard something on the radio the other day that really made me think. China has had a one-child per family policy for some time now, which I always thought was strange and horrifying, but I never really gave it more thought than that. Here's the part where my mind blew... If you think about the children of the first generation of only children, you'll realize that their parents had no brothers or sisters... If you think about what that really means, you'll realize that after just two generations, Aunts, Uncles, and Cousins do not exist! Of course, I'm sure that lots of people can get away with having more than one child, but the idea that a country could push extended family nearly out of existence is terrifying to me.
On a completely different note, I think everyone should go to http://www.ted.com/ and watch a talk that sounds interesting to them. Just about every subject is covered, and I think there is something for everyone. I never cease to be amazed and inspired by the ideas and information that I discover on that website. There is a link on the right side of this blog, but I think everyone should watch this video, which I found completely fascinating and important:
Aditi Shankardass: A second opinion on learning disorders Video on TED.com
I also thought these two were really interesting:
Pattie Maes and Pranav Mistry demo SixthSense | Video on TED.com
Keep in mind that this one is from 2006...the first TED video I ever saw, the one that got me hooked....
Jeff Han demos his breakthrough touchscreen Video on TED.com
Sunday, June 20, 2010
THE HOGFATHER
My idea of the perfect day is spending time with the people I love, and waiting all day for a few bites of perfect, juicy, tasty meat. That being said, my first Father's day was a huge success! I spent the whole day hanging out with family and smoking some pulled pork on the barbecue.
The pork preparation began at 10:30 in the morning... I massaged a gorgeous 4 pound pork shoulder with a blend of paprika, kosher salt, new mexico and chipotle chili powders.
 I tied the shoulder up with some kitchen twine to help it hold its shape, and let it rest for a good 30 minutes while the coals got going. Once things were properly heated up, I added some mesquite chips and the pork to the grill.
With the pork over a pan of water and very low indirect heat, I checked the meat every hour, and let it cook for about 7 hours.. adding a few coals and adjusting the vents every now and then to maintain the temperature. It cooked to about 180 degrees in the center.
This is what it looked like about two-thirds of the way through cooking:
 and here it is fully cooked, before shredding...


In all honesty, this was some of the best tasting meat I've ever eaten. I think the chard, coleslaw, bun, plate, and fork were all just distractions... I would've eaten this meat straight from the grill with both hands tied behind my back if it was my only option.
I think this Father's day thing is really going to work out well for me...

This is what it looked like about two-thirds of the way through cooking:


Now, I know the meat might look a little burned in the pictures, but I assure you that it was far from it... The black crust that you see is what defines real barbecue... it's called bark, and I think it is the tastiest thing on the entire planet... its kinda like crunchy, smoky, caramelized, bacony heaven. The bark is not only delicious, but it helps contain the deliciousness inside the pork shoulder.
If you click on the pictures and view them full size, you can see where little rivers of bliss have broken through the crusty bark!
From this point, the meat rested for a bit, was shredded, and had some tangy barbecue sauce added to it... We served the meat with coleslaw on a Kaiser roll, and red chard on the side... it was to die for! The only critique I can come up with is that we could have chosen a better bun: the kaiser rolls were a little dry... and something a bit moister and fluffier would have been just the ticket.

In all honesty, this was some of the best tasting meat I've ever eaten. I think the chard, coleslaw, bun, plate, and fork were all just distractions... I would've eaten this meat straight from the grill with both hands tied behind my back if it was my only option.
I think this Father's day thing is really going to work out well for me...
Sunday, June 13, 2010
FIRST HARVEST
We awoke a few mornings ago to find this in our garden....

I took a closer look and found that some kind of dastardly creature was so rude as to steal half the tip of our strawberry and eat it. I decided that the we couldn't afford to lose any more of our prize strawberry, and promptly picked it and cut out the eaten portion... leaving this:

I ate my half in two bites... the first bite was like no strawberry I've ever had. I can't quite explain it, but it just had a strawberry essence that must have come from the freshness, and was just perfect. The second bite wasn't quite so magical... it was actually downright sour. I think the strawberry should have ripened for another day or two, but it wasn't to be... We've got another one turning red now, and I'm definitely going to push it to the edge before picking it.
Our garden is really picking up some steam these days... the Nordello peppers have started popping up, and so have the poblanos... and just this morning, I noticed our first tiny tomato. This is all so exciting, considering that no plant other than a cactus has ever survived my care....


Monday, June 7, 2010
CHOCOLATE LOBOTOMY
My wife's dessert of choice is a brownie... not just any brownie, though, they have to be really goopy and undercooked. Quite frankly, with egg in the batter... this is a little bit gross. We happened on a discovery today that may be the beginning of a new dessert era. Called chocolate cobbler, or hot fudge cake, this creation has it all... fully cooked, crispy, chewy, and goopy... all in one glorious dish! I don't think the recipe we used is THE recipe, but I think it is definitely on its way. It had the goopy and the cakey part, but could have used more chewy and crunchy.
I thought the baking process was really interesting. It started with a thick layer of batter that was spread into the bottom of a baking dish. This layer was then covered with a dry sugar and cocoa mixture.

Some hot tap water was poured over the top of the whole thing, and it went straight into the oven, with no stirring.

This was the result... a nice, moist, cakey center, a pretty good upper crust, and a liquidy, oozy, rich chocolate sauce under it all.

This is a definite keeper, but next time, I plan on trying a different recipe... one that will hopefully give a bit more crunchiness and chewiness to the whole thing...
This is the last thing I remember seeing... When I regained consciousness, all the chocolate was gone, and I had the strangest feeling in my stomach....

Subscribe to:
Posts (Atom)
